Friday, March 18, 2011

Spring Cleaning, Pt. 1

As spring break winds down, it marks the time of year for spring cleaning—the preparation for the fun, sun-filled summer season. And no different then everyone else I, too, am embarking on this age-old tradition (Really, people have been doing this for over a thousand years!)... Version 2k11.

I am going to end my streak of "Oh, I have two posts waiting to be done..." or "Don't worry about taking pictures of this meal, I still have so much left to do." Now that I have had my three 20-hour-workday hell weeks known as midterms, summer applications, and random meetings fulfilled, it was time to runaway and wind down: aka Spring Break. Filled with lots of sun (I dub 2011 "my year as a beach bum"), reading, clubbing, and relaxation (I know the last two are oxymoronic), I visited my friend, Adriana, in Miami, FL. On a side note, one of my favorite things about this trip was the fruit! There are so many delicious tropical fruit that are both more expensive and not-quite-so-delicious in the Big Apple. So for this recipe, grab the last apples of the season and prepare yourself this Caramelized Apple Tart with a Honey-Ginger Crust. I was fooling around in the kitchen in Hawaii when I realized we had no cinnamon and only ginger. This was the birth of this delicious tart recipe!

Caramelized Apple Tart with a Honey-Ginger Crust


Crust:

-1 ¾ cups all purpose flour

-2 tbsp sugar

-1 tbsp ground ginger

-1/2 tsp salt

-1/2 cup (1 stick) chilled unsalted butter, cut into small cubes

-1/4 cup honey

-2 large egg yolks

-1 tbsp ice water

Filling:

-1 ½ cups (packed) dark brown sugar

-(optional) 1 ½ cup heavy whipping cream

[Personally, I don’t use heavy whipping cream unless necessary, however a few recipes will recommend its use in a caramel sauce. You can also use milk. Remember creamier=richer! I like the purer caramel without it—but that’s simply the opinion of a health-conscience co-ed]

-6 tablespoons (3/4 stick) unsalted butter

-lemon juice

-1 tbsp flour

-6 large McIntosh or Golden Delicious apples, peeled, cored, and sliced

Directions for Crust:

-Mix flour, sugar, ginger, and salt in a processor. (If you are like me and sadly do not own one, this can be done by hand!) Add butter. If using a processor, use the on/off pulsating turns, until the mixture looks like coarse meal.

-Whisk honey, yolks, and the ice water (not luke warm water, not cold water, ICE WATER. This is one of the keys to making a deliciously amazing crust) in a separate bowl.

-Add the honey mixture to the flour mixture. Process (or mix) until clumps form.

-Then gather the dough into a ball. Place on a piece of plastic wrap and flatten dough into a disk. Wrap tightly in the plastic and place in the refrigerator for at least one hour.

-Roll out the dough to about a 12” circle. Transfer into a pan and press it against the sides. Fold over the edges to have a thicker crust on the sides of the tart.

-Using a fork, press down on the sides to create a ridged-pattern (optional—for presentation’s sake).

Caramel Sauce:

-Bring sugar, cream (or milk or neither), and butter to a boil in a medium-heavy saucepan over medium-high heat, constantly whisking until the sugar dissolves. Be careful not to put the heat too high as to burn the sauce. Add a few drops of lemon juice and flour as it boils. Boil until caramel is thick enough to cover the spoon in a thick coat, about 10 minutes. (This can be made up to 5 days ahead). -Preheat oven to 375 degrees.

-Coat the apple slices with a little lemon juice. Then in a bowl, toss the apples as to lightly coat all of the pieces in caramel.

-Now arrange the apples in any way you wish in the tart crust. You can cut the slices and arrange them cut-side down, as to make a more vertical tart. You can also lay the slices down, one on top of the other, in order to make a more horizontally-appealing tart.

-Use any leftover dough from the crust to make any decorations and adornments on top of the tart.

-Place in the oven for 1 hour 15 min. Let sit for 15 minutes before serving.

-Voilà!

This recipe is especially nice when served with a light ice cream. Vanilla bean or coconut ice cream and crème fraîche are my personal favorites. My cooking tends to become more innovative with relaxation and time—two things that are for me, unfortunately, not always easy to come upon. Hawaii was filled with lots of it and was hence a source for inspiration. Miami was, as well, but not to the same extent. With “spring break” in mind, I found that I did not escape Columbia—seriously, its students were all over south beach (a comment on the Columbian demographic?)—but instead found myself forcing a balance of relaxation and “fun” onto myself. Without this, I would not have been able to write this blog post on the plane (like I am doing, now) out of pure exhaustion.

So, here’s to spring! Here’s to figuring out what you are trying to do (Miami had a lot of figuring out semesters and summers—Congratulations to Marina who got into the Argentina program)! Spring break is crucial when it comes to restoring balance in one’s life… or at least it was in mine. And as most other schools are just starting spring break, enjoy and remember to eat well. Live well.

Friday, January 21, 2011

In Small Packages Comes a Revolution of Flavor

This picture has been popping up all over my facebook newsfeed as Tunisian after Tunisian switches their profile picture. Not many people have heard of Tunisia and even if you consider yourself "informed," l'esprit tunisien is nonetheless most likely a novel concept. I happen to have grown up with a Tunisian family, spending at least a few nights a week eating Tunisian food and listening to the Tunisian news stream over the internet (which was a novel concept back in the 90s). If my ethnicity was decided by the cultures that I grew up surrounded by, I would be Angelino, French, Tunisian, and Chinese. Needless to say, I have always and will always love Tunisia. The Tunisian Revolution is well... revolutionary. It's one of the first of its kind: born and nurtured by the people and not an opposition party. And now, the revolutionary mindset is spreading throughout the Middle East: Hi, Egypt. And as President Obama said in his 2011 State of the Union speech "Around the globe, we're standing with those who take responsibility... that same desire to be free in Tunisia, where the will of the people proved more powerful than the writ of a dictator. And tonight, let us be clear that the United States stands with the people of Tunisia..." With people beginning to take a stand, it brings wonders of the future and what is to come. There are fears of fundamentalist factions gaining power through this coup à la Iranian Revolution. However for all the fears, there is double the hope for a new regime that represents the people and their desires. I cannot comment on what type of governmental hierarchy/organization/etc. I think will take over or whom I think should. Instead, I watch as a bystander, watching and hoping in ernst for the eventual outcome. Oh, how exciting these times we live in are.
So in dedication to my Tunisian family, those of you abroad--from Romania, Paris, to Los Angles--and to those still in Tunis and Sfax, this post is for you. Having a "Tunisian family" means I grew up cooking (mainly eating) delicious food. So while my family had an extravagant Maghreb Feast, I donated my favorite recipe: Brik (pronounced like the building material). Also, if you're not a fan of tuna, I recommend replacing it with ground beef! (Oh sooo delicious) It is a tuna and soft-boiled egg turnover--a small packet, lightly fried in olive oil. Like the small country hanging out at the tip of North Africa, these small packages are bursting with a revolution of flavor. Unexpected and delicious, one bite and you're sure to be hooked!
Here are a few shots from the rest of the night. (I apologize that I don't have a camera; you can thank Blackberry for these)
(tzatziki sauce in martini glasses, later accompanied with kabobs)

(Chicken Bastilla --Morocco)
("The Salad Room" 11 different North African salads)
Tuna and Caper Brik
(or ground beef AKA option 2) (Serves 7 people)

Spring Roll Wrappers
1 medium-sized Onion, diced
Salt & Pepper
Olive Oil
Eggs (1 per serving)

OPTION 1:
1 can Tuna Fish in oil
Capers

OPTION 2:
1 package Ground Beef
1 bush of Parsley, chopped

-OPTION 1: Take a pan and drizzle a little bit of oil in it. On medium-high heat, add the diced onions. Allow them to simmer for 5-10 minutes (or until soft).
-In a separate bowl, add a can of drained tuna, capers (drained of their juices), a bit of salt and pepper, and the cooked onions (try to get as little of the oil into the bowl!). Be careful to not let the mixture to get too oily!
-OPTION 2: Take a pan and drizzle a little bit of oil in it. On medium-high heat, add diced onions. Allow them to simmer until soft (5-10 minutes) and then add the ground beef.
-Stir the meat until it is fully cooked. (no more red pieces). When stirring, constantly chop up the meat to make it into small pieces.
-Transfer to a bowl and add parsley. (This stays good for a couple of days at least and can be made in advance or used for leftovers)

-Fill a stovetop pan with 1" of olive oil (or a few centimeters)... You can use the pan from the onions.
-Put the stove on medium-high heat and allow the oil to heat up. You will know when the oil is hot enough with a simple trick: Wet your hand using the faucet. Then flick a few drops of water into the oil. If it sizzles and pops (you should be able to hear and see it) once the water hits the oil, then the oil is hot enough.

-Meanwhile, separate two of the spring roll wrappers from the package. (Note: wrappers are very thin!)
-On the wrapper, place a small amount of the meat mixture in a crescent shape. Then crack the egg into the middle of the crescent, placing the egg and the egg yolk surrounded by the meat mixture.
-Fold the wrapper in half and place into the hot oil.
-Once you place the brik into the oil, use a spatula and press down on the brek all around the filling. (This makes sure not a lot of oil goes into the middle of the brik.)
-Lightly push some oil over the top of the brik. Flip the brek after 2-3 minutes. Cook another 2-3 minutes on the other side. The brik should be a golden-brown color.
-Place onto a paper towel and allow to cool for a few minutes. Then serve!

-Repeat until you have made enough for you and all of your friends! :)
This recipe is flexible! You can mix and match and play around with spices (if you so please) until your brik is exactly the way you like it. My mom likes to squeeze lemon juice on it. My friend's father likes to add tartar sauce (the time I made it with sharkfish--Hawaii was wonderful!) Personally, I like it the good old fashioned way. The way I grew up with. The way I was taught. Maybe I'm a traditionalist, or maybe I'm just a sucker for brik. I hope you enjoy one of my favorite foods. Once you learn how to make these, you might keep the ingredients in the freezer for a rainy day... (That's what I would recommend).
This is how I spent my winter break...
(The first shot it of a waterfall off the Hanakapiai Trail.... The second shot is Ke'e Beach)
And this is the harsh reality of winter...
(The first shot it of Barnard's campus during a blizzard... The second is post blizzard number 2...)

If you're in the Northeast, stay warm.
If you're in the Mid-West, stay really warm.
If you're on the West Coast, namely California, I'm jealous of your weather. Don't take it for granted!
And no matter where you live: Live Well. Eat Well.

Thursday, December 30, 2010

A Very Merry Christmas Feast

Although I have posted this picture once before, I ask you to notice the background. Once upon a time my family used to have a home in the mountains, memorable for my first steps, learning how to make alphabet-shaped pancakes, a myriad of meals, and countless family memories. Unfortunately, we eventually had to let it go and the house was sold. Well, this christmas season, a good portion of my family went down nostalgia lane and rented out the house. With time, things change. So naturally, there were some changes, but overall the house was almost as we left it... Babe Ruth chairs and all...
For this post, I'm going à la food porn and posting up some drool inducing pictures à la Pavlov's dog. So here's a little peak at my family's christmas feast...
Kaylin's Caesar Salad with romaine lettuce, grated parmesan, tomatoes, and croutons
Some delicious flaky biscuits à la Pillsbury
Roasted Vegetables baby broccoli, yams, mushrooms, bok choy, asparagus, and cauliflower
Mushroom and Parmesan Risotto
For my family of winos and all you other connoisseurs, check out this cult-favorite Napa Valley Duckhorn magnum
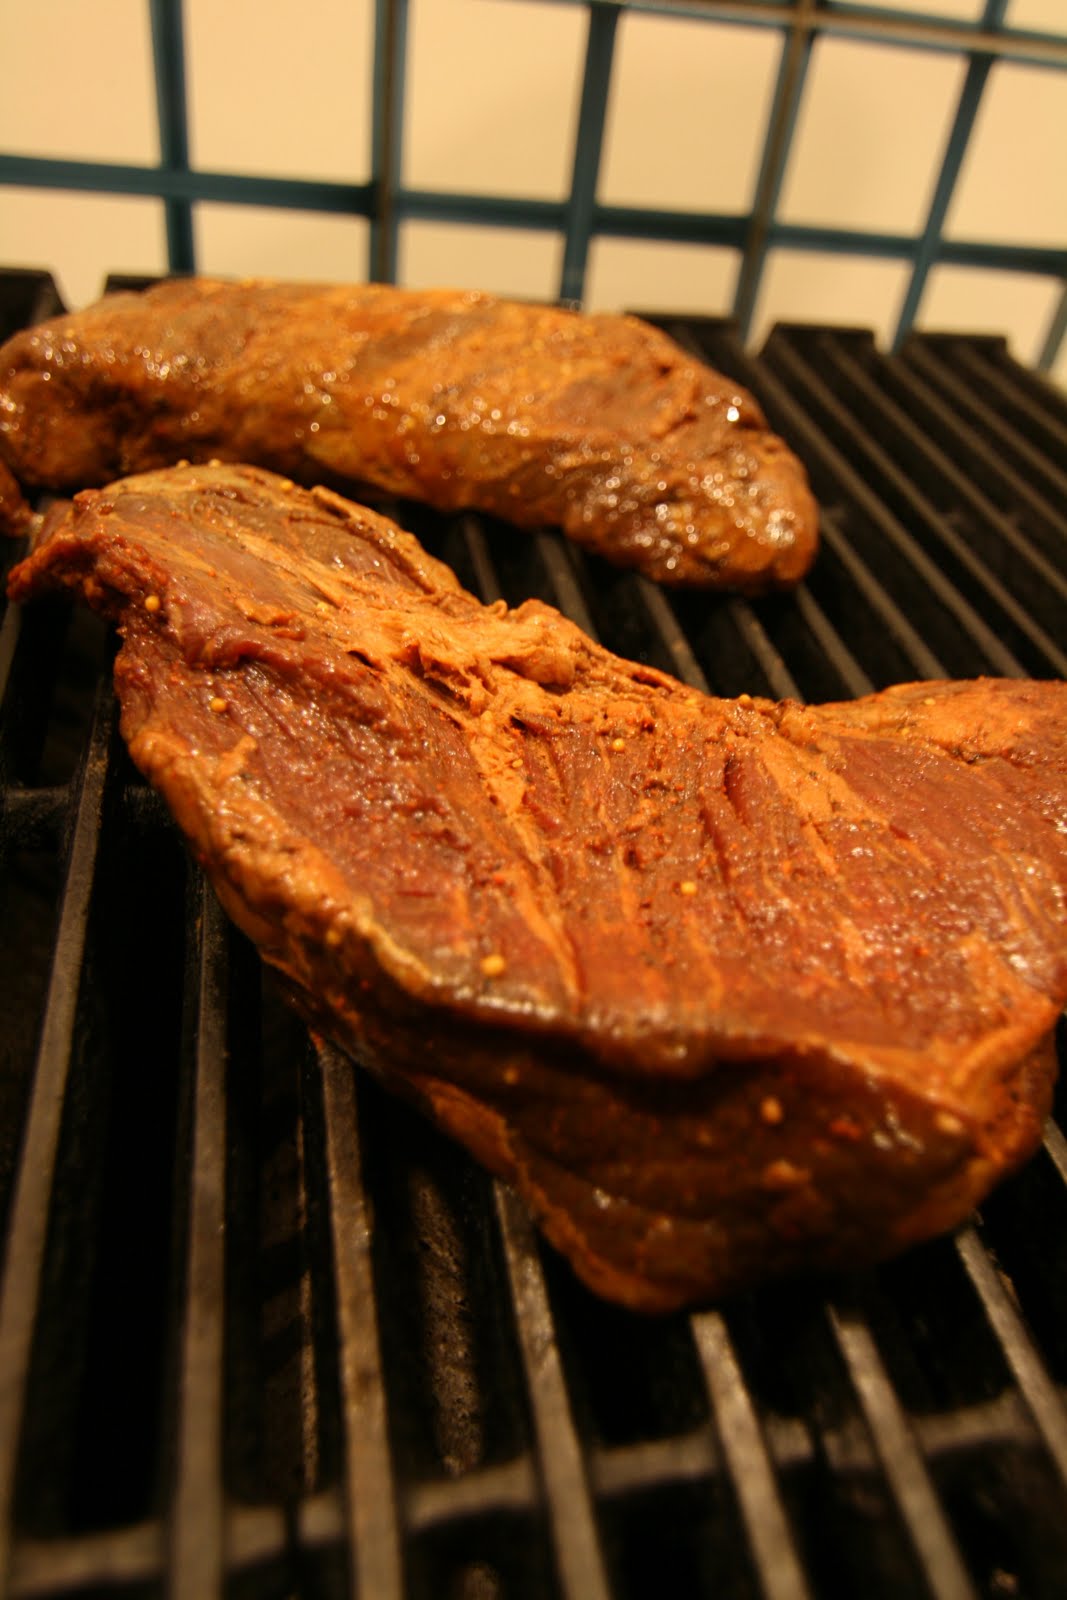
Scott picked up some tri tips from the Seaside Market in La Jolla, CA, where they vacuum seal the meat and marinade together. In this case, we got the Cardiff Burgundy Pepper Tri-tip (or as my uncle has dubbed "Cardiff Crack"... It's that good). With industrial strength vacuum sealers on its side, the marinade helps break down enzymes that helps the marinade penetrate the meat and spread the flavor throughout the entire cut! MMMmmmMMMmmm
Then all we did was grill it up! MMMmmmMMMmmm
Then came dessert. My sister who is a great baker made dessert.
Peppermint Bark, Cinnamon Toast Crunch Treats (think rice krispie treats but with cinnamon toast crunch)
Pumpkin Bread
Red Velvet Cake Truffles dipped in White Chocolate
(and as my sister exclaimed when she saw this photo
"Ooh! My balls look so good!")
Helping my sister frost her Chocolate Cupcakes with Peanut Butter Frosting

Take a bite... and find the surprise inside!
My sister put Reeses' Peanut Butter Cups in the middle of the cupcake!
And that concludes my delicious Christmas feast of 2010... Happy holidays to all! Get ready for new years!